Table of Contents
Packet Tracer Static NAT Configuration Example
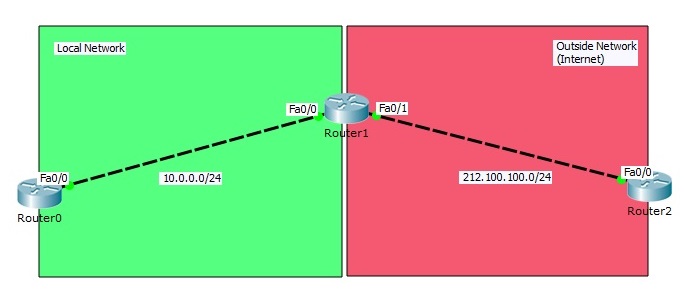
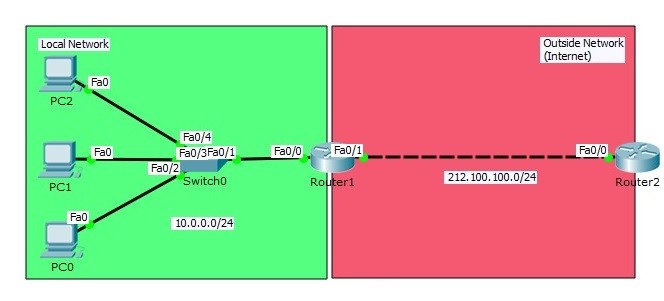
In this example we will configure Static NAT (Network Address Translation) on Packet Tracer. For our Static NAT configuration, we will use the topology below.
You can DOWNLOAD the Cisco Packet Tracer example with .pkt format at the End of This Lesson.
You can also DOWNLOAD all the Packet Tracer examples with .pkt format in Packet Tracer Labs section.
In this NAT topology, we will configure Static NAT on Router1. We wwill use Router0 and Router2 as host devices(For example like PCS).
Interface Configurations
In Router0 we will use private block IP address, because we will think that this area is our local network. In Router2, we will use public block IP addresses. Router2 will be like any place on internet.
Inside Local : 10.0.0.1
Inside Global : 212.100.100.10
Outside Local : 212.100.100.1
Outside Global : 212.100.100.1
We will also set “no ip routing” on host devices (router0 and router2) and configure the default gateway address of host devices.
After IP connectivity, let’s check the packets situation by openning debug with “debug ip icmp” command. Till now, we did not configure any NAT on Packet Tracer. We will only see the packets source and destintion before Static NAT.
You can also DOWNLOAD all the Packet Tracer examples with .pkt format in Packet Tracer Labs section.





Router A (config)# ip nat inside source static 192.168.0.1 10.10.10.2
Dear Gokhan,
I think the command is : ip nat inside source static 192.168.0.2 10.10.10.2
Hi,I think there is no need this command:ip nat inside source static 192.168.0.2 10.10.10.2 because both ip have in one router..