GNS3 is one of the most used network simulators in networking world. We can use this program to practice on various network devices by loading their images to GNS3. To have more opportunity on GNS3, we can use virtual machines with this program as GNS3 VM. And with this usage, we have more opportunity to use different vendor network devices beside Cisco devices.
In this post, we will explain, how to install GNS3 with VMWare. The instructions here can be also used with VirtualBox that is another virtualization program. Here we will explain GNS3 Vmware installation detailly. And after this post, you can start to work with your GNS3 with virtualization technology.
Table of Contents
Download GNS3, GNS3 VM and VMWare
To use GNS3 with VMWare we should download three programs:
- GNS3
- GNS3 VM
- VMWare Workstation Player
You can find the websites that you will download these programs with the screenshots.
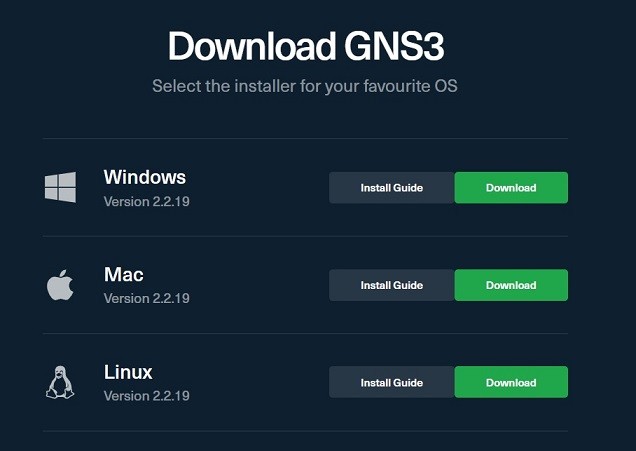
Download GNS3 from GNS3 website according to your operating system: https://gns3.com/software/download
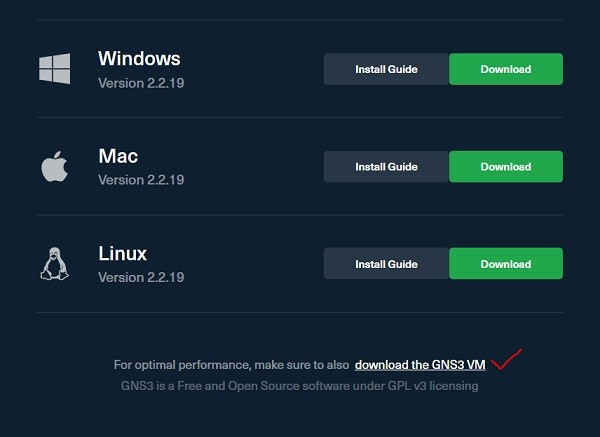
Download GNS3 VM from the same page – Click on *download the GNS3 VM*
Download VMware Workstation and Fusion
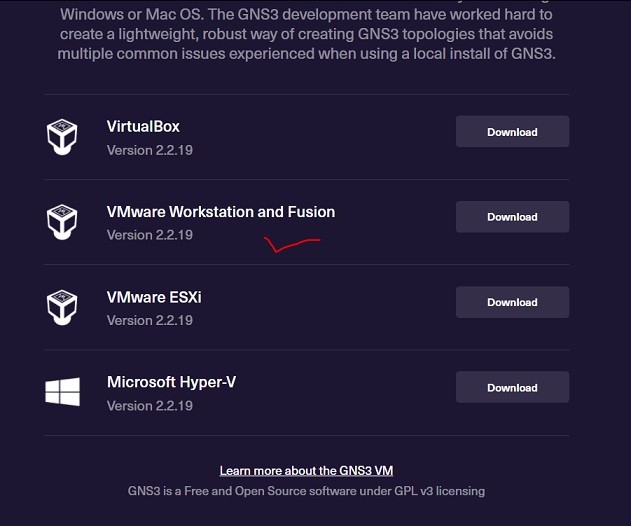
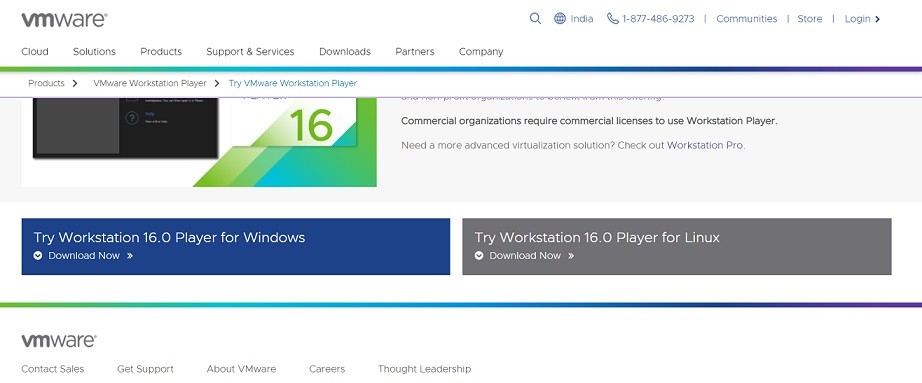
Download VMware Workstation Player from the VMWare website: -https://www.vmware.com/in/products/workstation-player/workstation-player-evaluation.html
GNS3 and GNS3VM Installation Steps
Firstly, we should install GNS3 software to our system. After downloading GNS3 VM, we will extract the file and get “.OVA file” in the extracted folder.
![]()
Then, we will Install VMware workstation Player in our system.
Click on Player -> File -> Open and import the GNS3 VM .OVA file to VMware Workstation

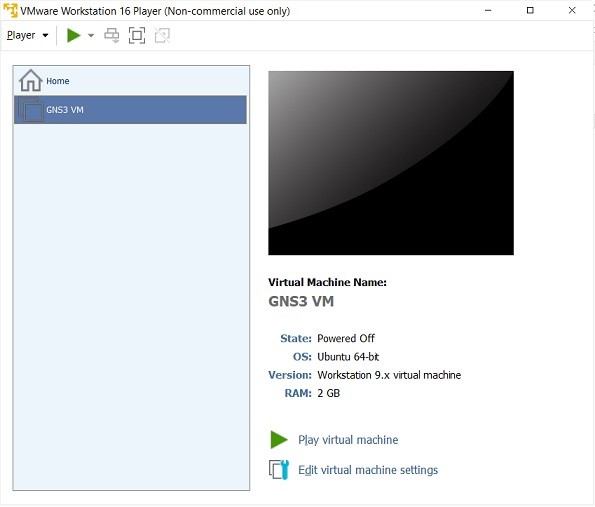
After importing the .OVA file, do not make any changes in Workstation Player for GNS3 VM. Accept all the default settings. After accepting all the default settings, something like this will be observed.
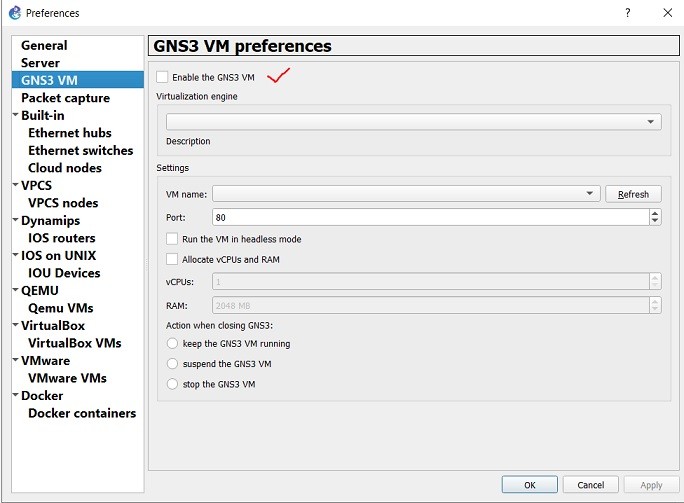
Open the downloaded GNS3 Software. Here we will enable GNS3 VM for GNS3 by going into the following steps.
Click on Edit -> Preferences -> GNS3 VM -> and click on enable *enable the GNS3 VM*
Select the VM name from drop down (name of the VM will be same as that of the extracted .OVA file (GNS3 VM).
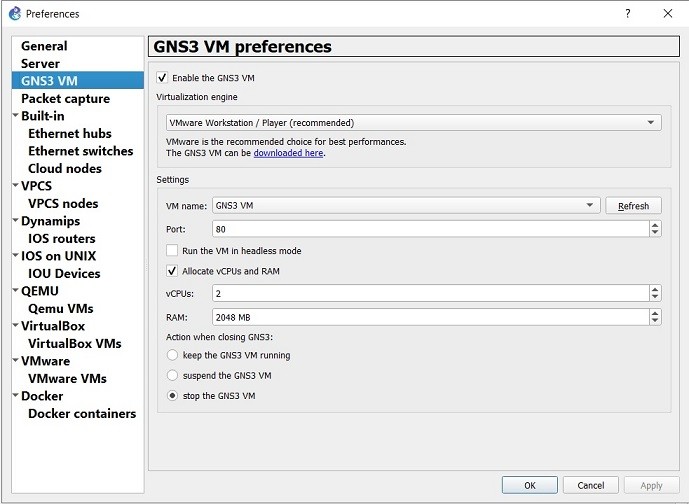
Allocate the vCPUs and RAM as per the configuration of your system.
IMPORTANT: After downloading and installing these software as per the above mentioned steps, close GNS3 software and VMware workstation player.
Open only the GNS3 software and the VMware player will open by itself and the GNS3 VM will be now active.
In this post, we have learned how to install GNS3, GNS3 VM and VMWare software to sue virtualization technology with GNS3. If you have any concern, you can reach out to IPCISCO.com.

Gokhan Kosem is a Network Engineer, Instructor and the Founder of IPCisco.com with 15+ years of experience in Cisco, Nokia, Huawei, Juniper, Linux, Service Provider Networks, Routing and Switching technologies.
He has worked on the backbone networks of major service providers and network vendors including Nortel, Alcatel-Lucent (Nokia) and has extensive hands-on experience with Cisco, Huawei, Juniper and Nokia networking technologies.
He has trained thousands of networking students worldwide through IPCisco.com, Udemy, books, labs, quizzes, and educational content across multiple social media platforms.
IPCisco.com | Best Route to Your Dreams


Leave a Reply