Table of Contents
Ping Command in Linux
Ping Command is the most used command in networking world. Maybe it is the first command that every network engineer has used firstly. During network integration, network operation and troubleshooting activities, we use Ping. There are different Linux Ping Commands used on Linux devices. So, here, we will focus on these commands in Linux. We will learn Linux Ping Command Options with different Examples.
Ping is the abbreviation of “Packet Internet Groper”.Mainly, we use Ping Command to check the connectivity of the peers in networking. In the network world, there are many Linux Servers or Linux based devices. On these devices, Ping is used too much. So, Ping Command in Linux is one of the important command with its Command Options.
To learn Windows Ping Commands, you can also check other Ping Command.
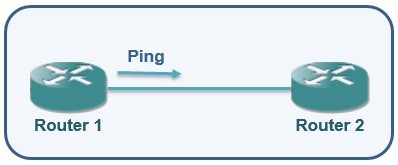
Pinging is the activity to send ICMP (Internet Control Message Protocol) messages between peers. In other words one peer sends ICMP Echo Request and the other replies with ICMP Echo Reply. So, the Ping process is completed. If there is a connectivity between peers, it is successfull. Or, it is unsuccessful.
The options of this command are very important during your network operations or troubleshooting activiries. So, knowing these Options, will provide you a better performance on your network.
Now, let’s focus Linux Ping and learn the Command Options detailly.
How to use Ping on Linux?
Using Ping Command in Linux, is similar to Windows. Simply, we use “ping” keyword and then we write the Ping Option. Lastly we write IP Address or hostname of the destination or ho that we would like to check.
ping [Option] Destination IP Address / Hostname
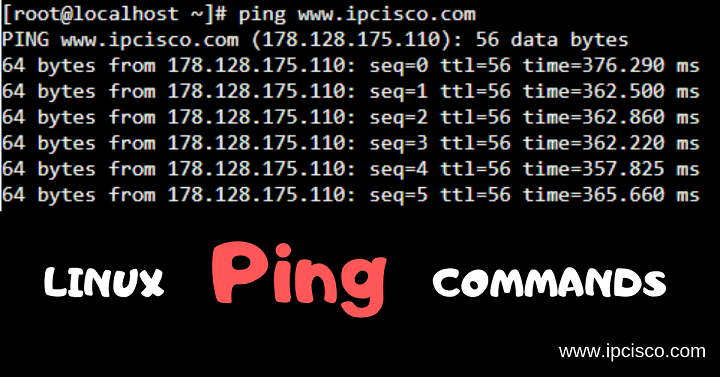
Below, you can find an example without options.
This is the pure usage of this connectivity checker command. To perform a better performance on our network operations and troubeshooting activities, we need more options of the Linux Ping command.
Ping command reply will include the below fields:
- Received Bytes Number
- IP Address
- Sequence Number
- Respond Tmie
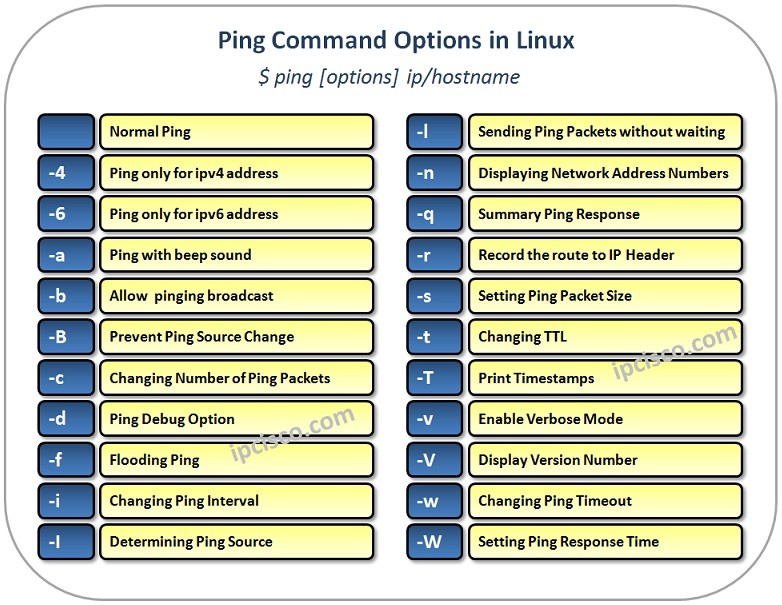
Linux Ping Command Options
There are many Options in Linux for this command like Options in Windows or in network equipments like routers. Here, we will learn all these Linux Ping Options one by one.You can use these Options, one by one or together with different combinations.
Specifying the IP Version
ping -4
If you would like to use it only for IPv4 Address, you can use “-4”. Below, we can force to ping www.ipcisco.com with IPv4.
ping -6
If you would like to use it only for IPv6 Address, you can use “-6”. Below, we can force to ping www.ipcisco.com with IPv6.
Ping With Sound
ping -a
If you would like to hear a beep sound, you can use “-a” option with Ping command in Linux.
Pinging Broadcast
ping -b
If you would like to allow pinging Broadcast addresses, you can use “-b” option. To use this command with 10.10.10.10 we will use the below Linux command.
Preventing Source Change
ping -B
To prevent source change, we use “-B” option with this Command. We will use destination address 10.10.10.10 with this option.
Changing the Number of Ping Packets
ping -c
“c” stands for “count”. If you use ping with “-c” and “a number” after it, it means that send ping with this number of times. For example, to send 10 ping to destination www.ipcisco.com or 10.10.10.10, we can use the below command:
Ping Debug Option
ping -d
Option “-d” stands for Debug. To enable Debug IP Packet like below, we use this Linux command option.
Flooding Ping
ping -f
“f” stands for “flood”. If you use ping with “-f”, it sends hundreds of pings per second. To send flood 10.10.10.10 address, we can use thebelow command:
Changing Successfull Ping Interval
ping -i
There is a default interval between successfull ping packets. This default value is 1 second. To change this default interval we can use“-i” option. It stands for “interval”. For example, if we change this interval to 3 second, we can sue the below Linux ping command. For pinging www.ipcisco.com.
Determinind Ping Source Interface
ping -I
Source Interface. “-I” Option is used to set the source of Ping packets. There can be multiple interface in your device. You can set a specific interface as the ping source. For example, below we set our ping source as fa1 for pinging www.ipcisco.com0
Sending Ping Packets Without Response
ping -l
To send ping packet without waiting for a reply, we use “-l” option. If you would like to set this a value more than 3, you should be a root user. To send multiple packets without response to destination 10.10.10.10 we use the below Linux Ping command.
If you are not a root user, you can use the below command to set this value:
Displaying Network Address Numbers
ping -n
To display network addresses as numbers not as host names.
Summary Ping Response
ping -q
To display only summary lines at the startup and the finish time, we use “-q” option.
Pinging a Local Host Only
ping -r
To ping a local host and bypass the routing table records, “-r” option is used.
Record Route Option
ping -R
“R” option is used for Record Route. It recordss the route of the packet inside IP Header.
<
Setting Ping Packet Size
ping -s
Ping “-s” option give us an opportunity to change the default ping packet size. The default ping packet is 56 bytes long. It is trantlated 64 bytes ICMP data. Below, we will change this packet size as 200 bytes for pinging 10.10.10.10.
Changing TTL Value
ping -t
With “-t” option, we can change TTL (Time to Live) Value of Linux Ping.
Ping Timestamp
ping -T
We use option “-T” to print timestamp with ping responses.
We can also use some more additional options together with “-T” options. These are given below:
- tsonly(timestamp)
- tsandaddr(timestamp + address)
- tsprespec(pre specified timestamp)
Enabling Verbose Mode
ping -v
With “-v” option, we can enable Verbose mode.
Displayin Version Number
ping -V
To display version number “-V” option is used.
Changing Ping Timeout
ping -w
With “-w” option, we can set the time that ping will exits independent of the number of the send packets. To set this time to 2 seconds, we will use the below command:
Changing Ping Response Time
ping -W
With “-W” option, we can set the time that we will wait for a ping response. For example to set this interval to 5 seconds, we can use the below command.
Linux Ping Examples
Example 1
Sending 10 packets with 100 Bytes Sized to 1.1.1.1
Example 2
Setting Interval to 5 seconds with ping debug option towards 1.1.1.1
Example 3
Checking connectivity to www.ipcisco.com from interface fa1 and with TTL 350, with verbose mode.
Example 4
Checking connectivity to www.ipcisco.com with setting response time to 10 seconds with timestamps.
Example 5
To send 12 packet without waiting any response from www.ipcisco.com with 200 bytes packets.
To learn Windows Ping Commands, you can also check other Ping Command.


Gokhan Kosem is a Network Engineer, Instructor and the Founder of IPCisco.com with 15+ years of experience in Cisco, Nokia, Huawei, Juniper, Linux, Service Provider Networks, Routing and Switching technologies.
He has worked on the backbone networks of major service providers and network vendors including Nortel, Alcatel-Lucent (Nokia) and has extensive hands-on experience with Cisco, Huawei, Juniper and Nokia networking technologies.
He has trained thousands of networking students worldwide through IPCisco.com, Udemy, books, labs, quizzes, and educational content across multiple social media platforms.
IPCisco.com | Best Route to Your Dreams


Very interesting and needed