Table of Contents
Etherchannel Configuration
Layer 3 Etherchannel with PAgP
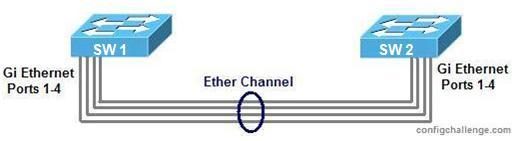
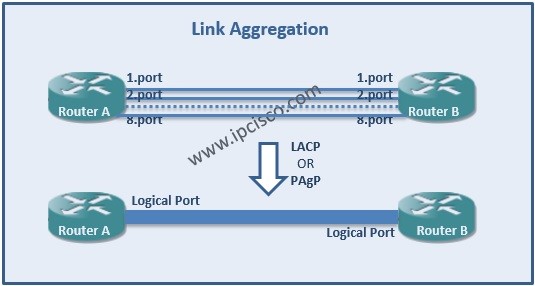
Spanning-Tree blocks redundant links and avoid Layer 2 loops. Etherchannels load balance the traffic between the redundant links and uses the bandwidth more efficient. Sp, how can we configure etherchannel? To understand more clear, here is a basic Etherchannel Configuration scenario with Cisco PAgP (Port Aggregation Protocol). You can check PAgP definition on wiki also. We have also done this with LACP before in another Link Aggregation example.
Here, two switches connected by four cable from their gigabit ethernet ports. We will bundle four of the physical link into one logical link.

1. First of all, we must create logical interface with “port-channel” command and assign it an ip address. Before assigning an ip address, it is important to change this port to a Layer 3 port by “no switchport” command.
SW1 (config) # interface port-channel 1
SW1 (config-if) # no switchport
SW1 (config-if) # no shutdown
SW1 (config-if) # ip address 192.168.3.1 255.255.255.0
SW1 (config-if) # end


Gokhan Kosem is a Network Engineer, Instructor and the Founder of IPCisco.com with 15+ years of experience in Cisco, Nokia, Huawei, Juniper, Linux, Service Provider Networks, Routing and Switching technologies.
He has worked on the backbone networks of major service providers and network vendors including Nortel, Alcatel-Lucent (Nokia) and has extensive hands-on experience with Cisco, Huawei, Juniper and Nokia networking technologies.
He has trained thousands of networking students worldwide through IPCisco.com, Udemy, books, labs, quizzes, and educational content across multiple social media platforms.
IPCisco.com | Best Route to Your Dreams


Very intricate blog, father a super servant! Desing is cool!