- COURSES
- SPECIALS
- BLOG
- MEMBERS
- SHOP
- BOOKSHELF
- ABOUT
- ENROLL HERE
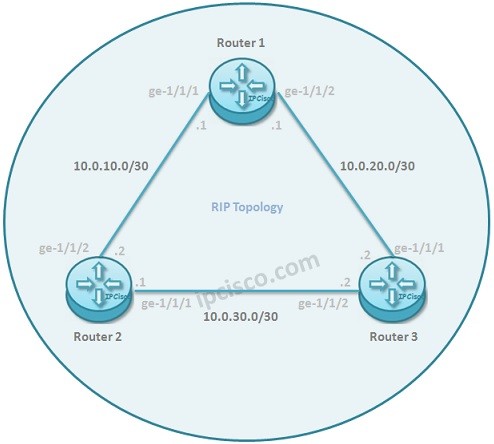
Table of Contents
In this lesson, we will configure Juniper routers for RIPv2. RIP is the simplest Routing Protocol and configuring RIP on Juniper Routers need a couple of simple steps. We will see each of these steps one by one.
For our Juniper RIP Configuration Example, we will use the below topology.
Now, let’s focus on the Juniper RIP Configuration steps and start our RIP configuration.
Firstly, we need to configure all the interface addresses as given above. The IP connectivity is the first must, to configure RIP or any other Routing Protocol.
We can do IP configuration with the below command set:
Router 1
Router 2
Router 3
Here, we will configure a Routing Policy that will accept RIP learned and Directly connected Networks. Our Policy name will be RIPPolicy.


Leave a Reply