- COURSES
- SPECIALS
- BLOG
- MEMBERS
- SHOP
- ABOUT
- ENROLL HERE

In the previous OSPF lessons we had talked about standard Standard and Backbone area types. In this lesson, we will talk about two of the the other Area Types of OSPF. Here, we will learn OSPF Stub Area Configuration and Totally Stub Area Configuration.
In this lesson we will focus on configuration mostly. But firstly, let’s talk about the theorical part of this OSPF Stub Area lesson.
You can DOWNLOAD the Packet Tracer example with .pkt format at the end of this lesson.
You can check the below lessons for the configuration of different OSPF Area Types:
Stub Areas, Totally-Stub Areas, Not So Stubby Areas and Totally Not So Stubby Areas are the other area types of OSPF. These area types are prevent some routes to enter the Area routers. We will check all of these one by one.
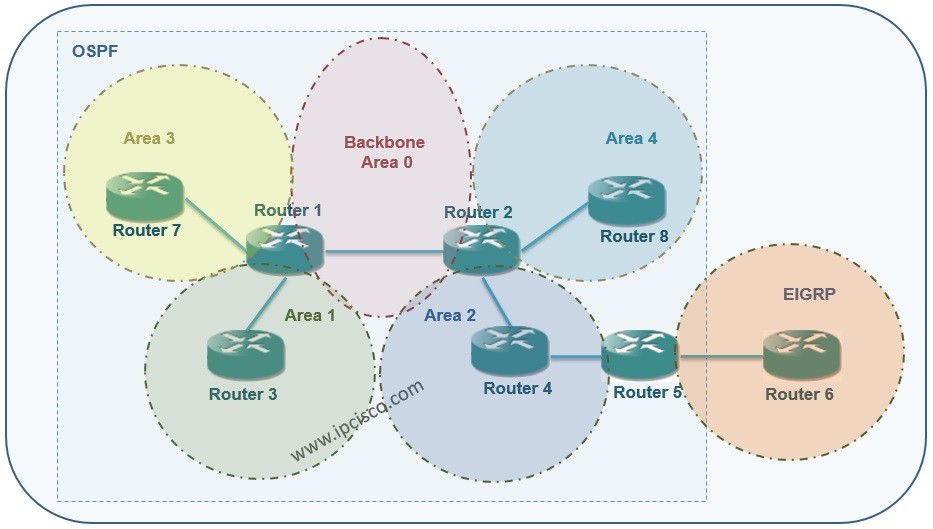
For this article, the below topology will be our reference topology.

Table of Contents
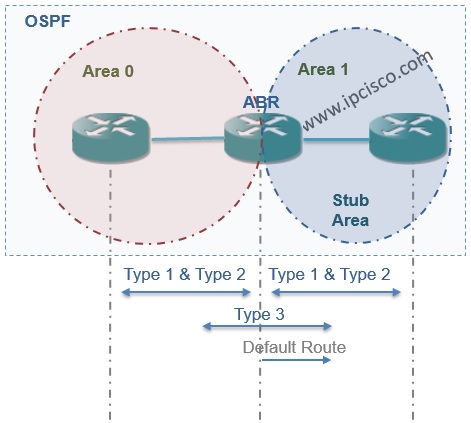
Stub Area is the area that do not accept the External LSAs(Type 5). Stub Areas accept the summary LSAs Type 3 beside the Default Route from the Backbone Area. They also do not accept Type 4 LSAs.

To configure an area as a Stub Area, we need to configure all the routers in this area as Stub. Because, configuring a router interface as a Stub, changes the option bits in the Hello Packets. To form a new neigbourship, the other end router need to be configured as Stub.
The cofiguration is like below:
On our main topology, we will configure the Area 1 as stub. The stub area configuration will be like below on both Router1 and Router3:
After this configuration, the show ip route output will be like below:
As you can see, Type 3, Type 4 LSAs and Default Route is in the routing table. External LSAs, Type 5 is not accepted.
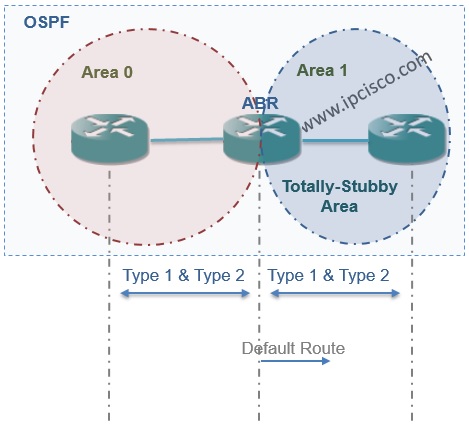
In this Area type, beside External LSAs(Type 5), LSAs Type 3 and Type 4 are also not accepted. Only a default-route is accepted by a Totally-Stub Area.

Leave a Reply