- COURSES
- SPECIALS
- BLOG
- MEMBERS
- SHOP
- BOOKSHELF
- ABOUT
- ENROLL HERE

In this Cisco SNMP Configuration Example, we will see how to configure SNMP on Cisco SNMP Agent device. In this part I do not consider necessary what the snmp agent is. You already know that it is the device that we consider to manage with our NMS (Network Management Server).
Managing all the network devices are a very difficult. So managing the network devices in one location is very important in network world. This is done with a standard protocol SNMP. With SNMP you can manage your devices with a NMS remotely and in a central point. And the agent device also sends traps,notifications about alarms or exceeding some threshold values determined before for a good managed network.
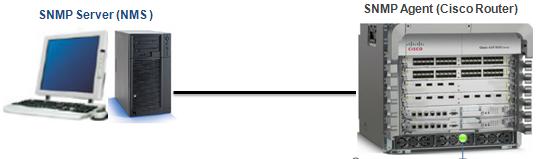
Table of Contents
Like for all the vendor devices, to manage a Cisco devices from a central point we need SNMP. And to use SNMP, for Cisco SNMP Configuration, we need to enable this protocol. Enabling this protocol is done by creating a community strings. Community strings are used for the different access forms in SNMP. You can make the below configuration for different community string definitions.
Router (config)# snmp-server community public ro
Router (config)# snmp-server community ForYou ro
Router (config)# snmp-server community WithYourACL rw 10
Router (config)# snmp-server community HidenOne ro view noRouteTable
Router (config)# access-list 10 permit 192.168.100.1
Above, there are four community strings are defined. The first one can be for eveyone with only read-only access. The second one can be for you only. Here it is important to say that other vendors do not permit more than one read-only community strings.
The third community string above is the read-write one only allowed as the access-list 10. And the last one is the one that can be reached only with a certain user.
Learn more Cisco Configurations with Cisco Packet Tracer Lab Course!
On our Cisco SNMP Configuration example, after defining community strings, it is time to configure something for SNMP traps that will inform SNMP Server during any trouble. To do this, use the below configuration commands.
Router (config)# snmp-server enable traps
Router (config)# snmp-server host 192.168.1.1 public
With the first command, you enable the traps. And with the second one, you are writing the NMS ‘s ip address that the traps will go. And after that you mention the community string that will be used during connection.
If you want, you can write traps for more than on SNMP Server. And you can also write traps command for only specific protocols’ trap messages. Check the below commands for these ones.
Router (config)# snmp-server host 192.168.1.1 public snmp eigrp bgp
Router (config)# snmp-server host 192.168.2.2 public snmp
Here, as you can see, the trap commands used for two different SNMP Server, with two different protocol trap message wish.
You can also configure with which SNMP version 1 or 2c traps are sent, and what UDP port are the traps sent to. Like these, you can configure some more things, about traps.
As an example, you can check the below ones:
Router (config)# snmp-server enable traps bgp
Router (config)# snmp-server enable traps link-status
Like enabling, you can also disable specific traps.
Router (config)# no snmp trap link-status
Here we can say a best configuration habit. To enter contact and location information during SNMP configuration is a best practice.
Router (config)# snmp-server contact Gokhan Kosem, Network Engineer, +90 (111) 2233333
Router (config)# snmp-server location XYZ Company IP/MPLS Department, Floor 5, Istanbul
You can also find useful the below command. Especially the packetsize command is very important for core part of the networks.
Router (config)# snmp-server chassis-id 1202293
Router (config)# snmp-server packetsize 1500
Router (config)# snmp-server queue-length 12
Router (config)# snmp-server trap-timeout 30
The chassis ID is the software chassis id, burned into the CPU card on the router. And packetsize specifies how big an SNMP get or set is allowed. The default one is 1500 bytes. Queue-length and trap-timeout refer to retransmission queue for SNMP traps. When an interface fails, the router may be temporarily unable to send the linkDown trap. The router will then periodically re-try sending the SNMP trap(s) it couldn’t send every 30 seconds by default . The trap-timeout changes this retry interval, default 30 seconds. The queue-length is how many traps get saved for retransmission in this fashion, default value is 10.If you don’t have dial backup, you might wish to set the queue-length to 1.
Lastly, it is important to tell that configuring SNMP, using loopback interfaces is also a best practice. Because loopback interfaces are always on interfaces. So the physical related problems can not prevent you to use SNMP and you are always connected to the device.
In the next article, we will talk about SNMP configuration on Juniper device. To learn different vendors’s SNMP configuration and manage more devices with SNMP, keep on ;)

Gokhan Kosem is a Network Engineer, Instructor and the Founder of IPCisco.com with 15+ years of experience in Cisco, Nokia, Huawei, Juniper, Linux, Service Provider Networks, Routing and Switching technologies.
He has worked on the backbone networks of major service providers and network vendors including Nortel, Alcatel-Lucent (Nokia) and has extensive hands-on experience with Cisco, Huawei, Juniper and Nokia networking technologies.
He has trained thousands of networking students worldwide through IPCisco.com, Udemy, books, labs, quizzes, and educational content across multiple social media platforms.
IPCisco.com | Best Route to Your Dreams


Leave a Reply