- COURSES
- SPECIALS
- BLOG
- MEMBERS
- SHOP
- BOOKSHELF
- ABOUT
- ENROLL HERE
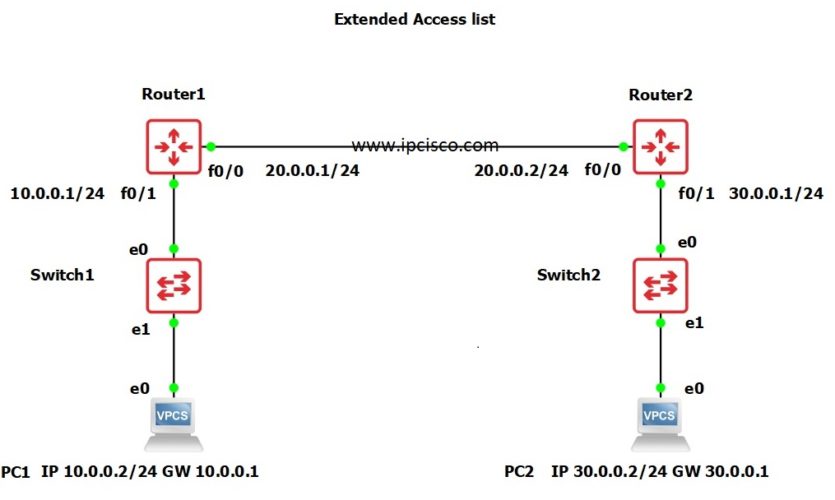
In this configuration example, we will focus on Extended Access-Lists. We will learn Extended ACL Cisco Configuration with the help of GNS3. We will use the below GNS3 Extended Access List topology.
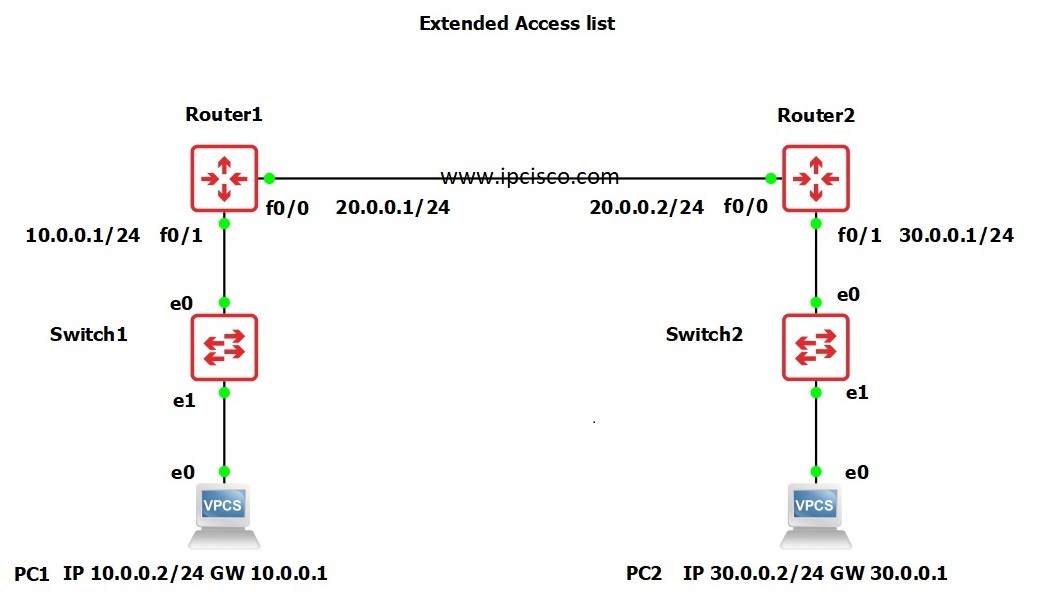
In this Extended ACL Cisco Configuration topology, we will deny ICMP packets from 10.0.0.0/24 subnet to 20.0.0.2/24 using extended access list. During our configuration, we will do also DHCP and static routing configuration.
Here, for out Extended ACL Cisco Configuration, we will follow the below configuration steps one by one on both of the routers:
In the most important part of this configuration, we will use Extended Access list to deny ICMP packets for the destination IP address 20.0.0.2/24 from 10.0.0.0/24 subnet. Reverse Ping is enabled from 20.0.0.2/24 to 10.0.0.0/24. How? Find that out! 😉
Let’s start to configure Extended ACL with GNS3 step by step.
You can Download GNS3 Extended ACL Configuration File.
Table of Contents
In the first step, we will configure DHCP Pool to give ip addresses from this pool. We will use the below configuration commands on GNS3 for this configuration.
Firstly, we will create DHCP Pool. Then we will give the DHCP Pool IP addresses. We will define default-gateway and lastly, we will exclude the ip address of the default-gateway to avoid any conflict.
Router1(config)# ip dhcp pool ipcisco //Creating DHCP pool
Router1(dhcp-config)# network 10.0.0.0 255.255.255.0 // Assigning pool of IP address
Router1(dhcp-config)# default-router 10.0.0.1 // Assigning Default-gateway for Hosts
Router1(config)# ip dhcp excluded-address 10.0.0.1 //To avoid IP assignment conflict as this is already assigned to router interface
In this step, we will define a static route to teach the route of the network that is not directly connected.
Router1(config)# ip route 30.0.0.0 255.255.255.0 20.0.0.2 //Static routing
This step is the main step of our Extended ACL Cisco Configuration example. Here, we will define the extended acl. With this extended acl, we will deny any packets coming from 10.0.0.0/24 to 20.0.0.2. And we will allow, exho-replies coming from the same source to the same destination for ping replies.
Before adding this Extended ACL list, firstly, let’s ping 20.0.0.2 from PC 1 before the application of Extended Access List.
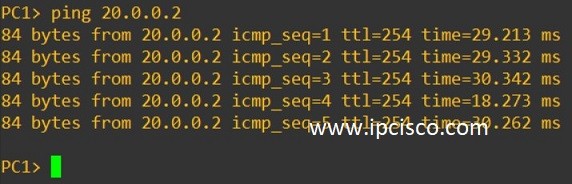
As you can see above, without any access list, we can ping from PC 1 to 20.0.0.2 ip address. After adding extended acl, we will do this ping again and we will check the results in the verification step.
Router1(config)# ip access-list extended 100 //Creating access-list
Router1(config-ext-nacl)# 1 permit 10.0.0.0 0.0.0.255 20.0.0.2 0.0.0.255 echo-reply
Router1(config-ext-nacl)# 2 deny icmp 10.0.0.0 0.0.0.255 20.0.0.2 0.0.0.255
Router1(config-ext-nacl)# 3 permit ip any any
Wondering what is 1, 2, 3? Yes! Then you’re learning great! In extended access-list we can add sequence numbers which can be removed or added unlike standard access lists!
After creating the extended access-list, know it is time to add this access list to the related interface. This interface is the fastethernet 0/1 interface of Router 1.
Router1(config)# int fa0/1
Router1(config-if)# ip address 10.0.0.1 255.255.255.0 //Assigning ip address to interface
Router1(config-if)# ip access-group 100 in //Applying access list to interface
NOTE: The direction IN and OUT is very important while applying access-group to an interface.
After this configuration, we will also do the similar configuration on Router2. But this time, we will use, different IP addresses.
To verify our Extended ACL Cisco Configuration, we will use ping to check the reachability from PC 1 to 20.0.0.2 ip address again.

As you can see above, ICMP packets (ping packets) are blocked to the destination 20.0.0.2. Let’s use trace command to prove that, only ICMP packets are blocked. To do this, we will use a trace option, option -P.
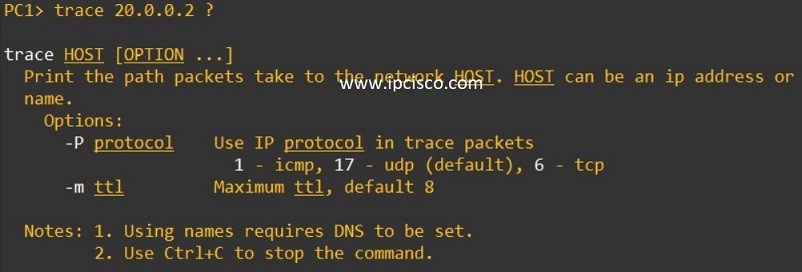
As you can see above, -P 1 is using ICMP packets and -P 6 is using TCP. When we use –P 1 (ICMP) , it will be unsuccessfull like below.

If we use –P 6 (TCP) , it will be successfull like below.

Lastly, let’s check our Extended Access List with “show ip access-lists 100” command.


Gokhan Kosem is a Network Engineer, Instructor and the Founder of IPCisco.com with 15+ years of experience in Cisco, Nokia, Huawei, Juniper, Linux, Service Provider Networks, Routing and Switching technologies.
He has worked on the backbone networks of major service providers and network vendors including Nortel, Alcatel-Lucent (Nokia) and has extensive hands-on experience with Cisco, Huawei, Juniper and Nokia networking technologies.
He has trained thousands of networking students worldwide through IPCisco.com, Udemy, books, labs, quizzes, and educational content across multiple social media platforms.
IPCisco.com | Best Route to Your Dreams


Leave a Reply