- COURSES
- SPECIALS
- BLOG
- MEMBERS
- SHOP
- BOOKSHELF
- ABOUT
- ENROLL HERE
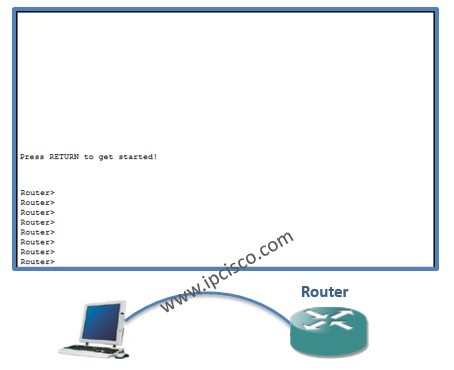
Table of Contents
In this Basic Cisco Router Configuration lesson, we will see how to configure a Cisco router basically with the help of Packet Tracer. This CCNA lesson will be an entrance to routers for a Cisco router newbie. Here, we will see Basic Cisco Router Configuration.

You can DOWNLOAD the Packet Tracer example with .pkt format here.
This is the fisrt question of a Cisco router newbie, a new network engineer :) Do not worry it is vey basic. To configure a Cisco router, first of all youneed to enter the “enable mode”. Normall you are under user mode, you can run only show commands. To enter enable mode use the below command:
Router>enable
After this command you are in enable mode. But to make configuration, you need to enter also teh below command under enable mode:
Router#configure terminal
Enter configuration commands, one per line. End with CNTL/Z.
Router(config)#
Now you can do any configuration on the Cisco router. After a while, you will gain Cisco hands on experience and speed. At this time you will write “en”, instead of enable, “conf ter” instead of configure terminal etc…
To configure the hostname of the router, use the below command. Here, hostname is the name of your router.
Router(config)#hostname MyRouter
MyRouter(config)#
As you can see, the name of the router has changed as MyRouter.
To give a password to your router, you can use the “Enable Password” and “Enable Secret Password”. Enable Password stores your password as a clear text. If you want to encryp it you need to use service password-encryption command. Enable Secret Password stores your password in MD5 encryption. And “Enable Secret Password” is more secure. You can check the seem of enable secret in configuration file below.
MyRouter(config)#enable secret 1234567
MyRouter(config)#service password-encryption
You can view the encrypted password with “show running-config” command.
MyRouter#show running config

...
enable secret 5 $1$mERr$iHGIpzTedTCk9bQ93Wry30

...
You can configure your console connection. The console password, the history size can be configured. To do this we will use the below commands in thiz Basic Cisco Router Configuration lesson.
MyRouter(config)#line console 0
MyRouter(config-line)#password cisco123
MyRouter(config-line)#login
MyRouter(config-line)#history size ?
<0-256> Size of history buffer
MyRouter(config-line)#history size 10
Beside these the logging syncronization of console can be configured here. Many new engineers complaintive about the logging synronization of the console. While they are writing someting on the router, it sometimes print something on the secreen and divides your writings. I do not affect the command but it affect your seem. To avoid this, use “logging synchronous” command.
MyRouter(config-line)#logging synchronous
You can also DOWNLOAD all the Packet Tracer examples with .pkt format in Packet Tracer Labs section.
A second more complaint comes about the time out of the session. After a certain of time without a user input, your router time-out. To avoid this use “exec-timeout” command.
MyRouter(config-line)#exec-timeout ?
<0-35791> Timeout in minutes
MyRouter(config-line)#exec-timeout 0 ?
<0-2147483> Timeout in seconds

MyRouter(config-line)#exec-timeout 0 0
You can use the same commands used in console connection options under also telnet connection. There are 0 to 15 telnet connections.
MyRouter(config)#line vty 0 15
MyRouter(config-line)#password cisco123
MyRouter(config-line)#login
To configure an interface, firsty you need to go to that interface configuration mode. And then, under this interface, add the ip address with its mask. Do not forget to write “no shutdown“. This opens the interface.
MyRouter(config)#interface GigabitEthernet 0/0
MyRouter(config-if)#ip address 10.0.0.1 255.255.255.0
MyRouter(config-if)#no shutdown

MyRouter(config-if)#
%LINK-5-CHANGED: Interface GigabitEthernet0/0, changed state to up
“Banner Moth” is another one of basic router commands on Cisco. To use it , in the configuration mode, use “banner motd“command. After this write “d” and enter. Then write your message, and finish it with “d” again.
MyRouter(config)#banner motd d
Enter TEXT message. End with the character 'd'.
Merhaba! Hello! Bonjour! Hola! Namaste! d

After you exit from the console, with multiple exit, you will see the below.
(Do not wait for time-out, we closed it)

Press RETURN to get started!

Merhaba! Hello! Bonjour! Hola! Namaste!

User Access Verification

Password:
To save the configuration, we will use “copy running-config startup-config”. The exact (startup-config) configuration is stored at NVRAM, and the running config is stored at RAM. As you know RAM is temporary storage. To save this confiugration to a permanent one, use “copy running-config startup-config” command.
MyRouter#copy running-config startup-config
To see the full configuration, use “show running-config” command. This is the last configuration you did. If you wonder the startup configuration stored in NVRAM, use “show startup-config” command.
MyRouter#show running-config
In this Basic Cisco Router Configuration lesson, I tried to explain, how to configure Cisco routers basically to a Cisco Router Newbie. We have seen basic Router commands on Cisco. This is only the beginning. Welcome ;)
You can DOWNLOAD the Packet Tracer example with .pkt format here.
You can download “Packet Tracer” in Tools section.


Leave a Reply